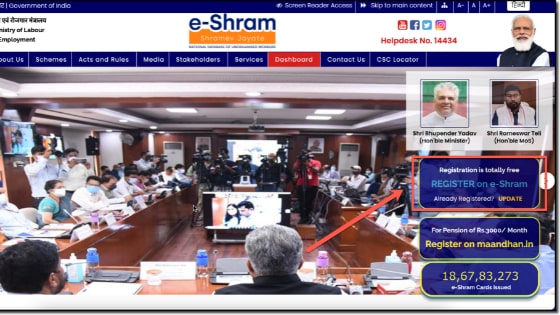
E-Shram Card Registration online @register.eshram.gov.in under E Shram Card Yojana:
The Indian government provides E Shram Cards to laborers. Ministry of Labour & Employment
has launched E Shram portal for the unorganised workers.
Through this portal, the Central Government will be able to collect the data of all laborers.
According to the data released by the center, around 38 crore workers in unorganized sectors will be able to get e-shram cards.
Once laborers have successfully registered for e-Shram Yojana, a 12 digit Universal Account Number will be issued to them. Once beneficiaries enroll for the first time, they won’t have to repeat the process.
If you want to get an e shram card, you will have to apply for it through an online mode from its official website- eshram.gov.in / register.eshram.gov.in.
To find out more about the Shram Card, such as the benefits, major points, the registration process, and other important information, read this article properly.
E-Shram Card or Labour Card Overview
| Scheme/Yojana | E-Shram Card Yojana |
| Motive | Helping the Labourers |
| Total Budget | Rs. 404 Crore |
| Eligibility Age | 16-59 Years |
| Accidental Death Insurance | Rs. 2 Lakh. |
| Partially Handicapped Assistance | Rs. 1 Lakh. |
| E-Shram Registration Charges at CSC | Rs.20 per registration |
| Official Website | eshram.gov.in / register.eshram.gov.in |
E Shram card online application 2022
The launch of the e-shram card in the country is one of the greatest initiatives taken by the government to provide financial and social security to the laborers in the country.
The E-Shram Card Yojana will be beneficial to construction workers, street vendors, migrant workers, and low-income workers.
First, you will have to apply for the social security scheme before you can benefit from the E-shram card. The best thing about shram card is that you can easily register on your own for this scheme.
Registration for e-shram yojana does not require you to go outside. Those who are illiterate or unable to operate a computer or mobile phone can visit the nearest common service center (CSC).
E-Shram Card Benefits & Important Facts
- As we are already aware, the central government launched the e-shram card yojana on 26th August 2021.
- The beneficiaries will be provided with Accidental Death Insurance worth 2 lakh rupees while partially handicapped people will also receive 1 lakh rupees after the incident.
- The government has allocated Rs 404 crore for the e shram yojana 2022.
- The E-Shram Yojana is open to all types of unorganised workers.
- An individual who pays income tax will not be eligible to apply for an e-Shram card.
- Employees Provident Fund Organisation (EPFO) and Employees State Insurance Corporation (ESIC) members are also excluded from the government’s e-shram card scheme.
- In case you are a citizen of Uttar Pradesh and have registered under the unorganized Eshram Yojana of the government, you will be able to receive an amount of Rs 500 before March 2022.
Persons covered by the E-Shram Program
- Marginal Farmers
- Small Farmers
- Agricultural Labourers
- Construction Workers
- Leather Labourers
- Fishermen
- Animal Husbandry Workers
- Croppers
- Beedi Rollers
- Other Workers Engaged in the Unorganised Sectors
E-Shram Card: Eligibility Criteria
In order to benefit from the E-Shram card Yojana, you have to meet some conditions.
- You must be a permanent citizen of India.
- You should have an Aadhaar Card issued by the Unique Identification Authority of India (UIDAI).
- Your income tax status must not be taxable.
- Beneficiaries must be 16 to 59 years of age.
- A registration fee of Rs 20 will be charged for the e-Shram Card Yojana in the E-Shram portal, while the application fee is free.
- You must apply to the Eshram scheme via its official website, which is eshram.gov.in.
- It is necessary to link a mobile number to your Aadhar card, as well as to have a bank account in a nationalized bank.
Self-registration for eshram card @ eshram.gov.in
Follow the below-mentioned steps to complete the E-Shram self-registration process:
#Step 1. Visit E-Shram Offical Website i.e. eshram.gov.in.
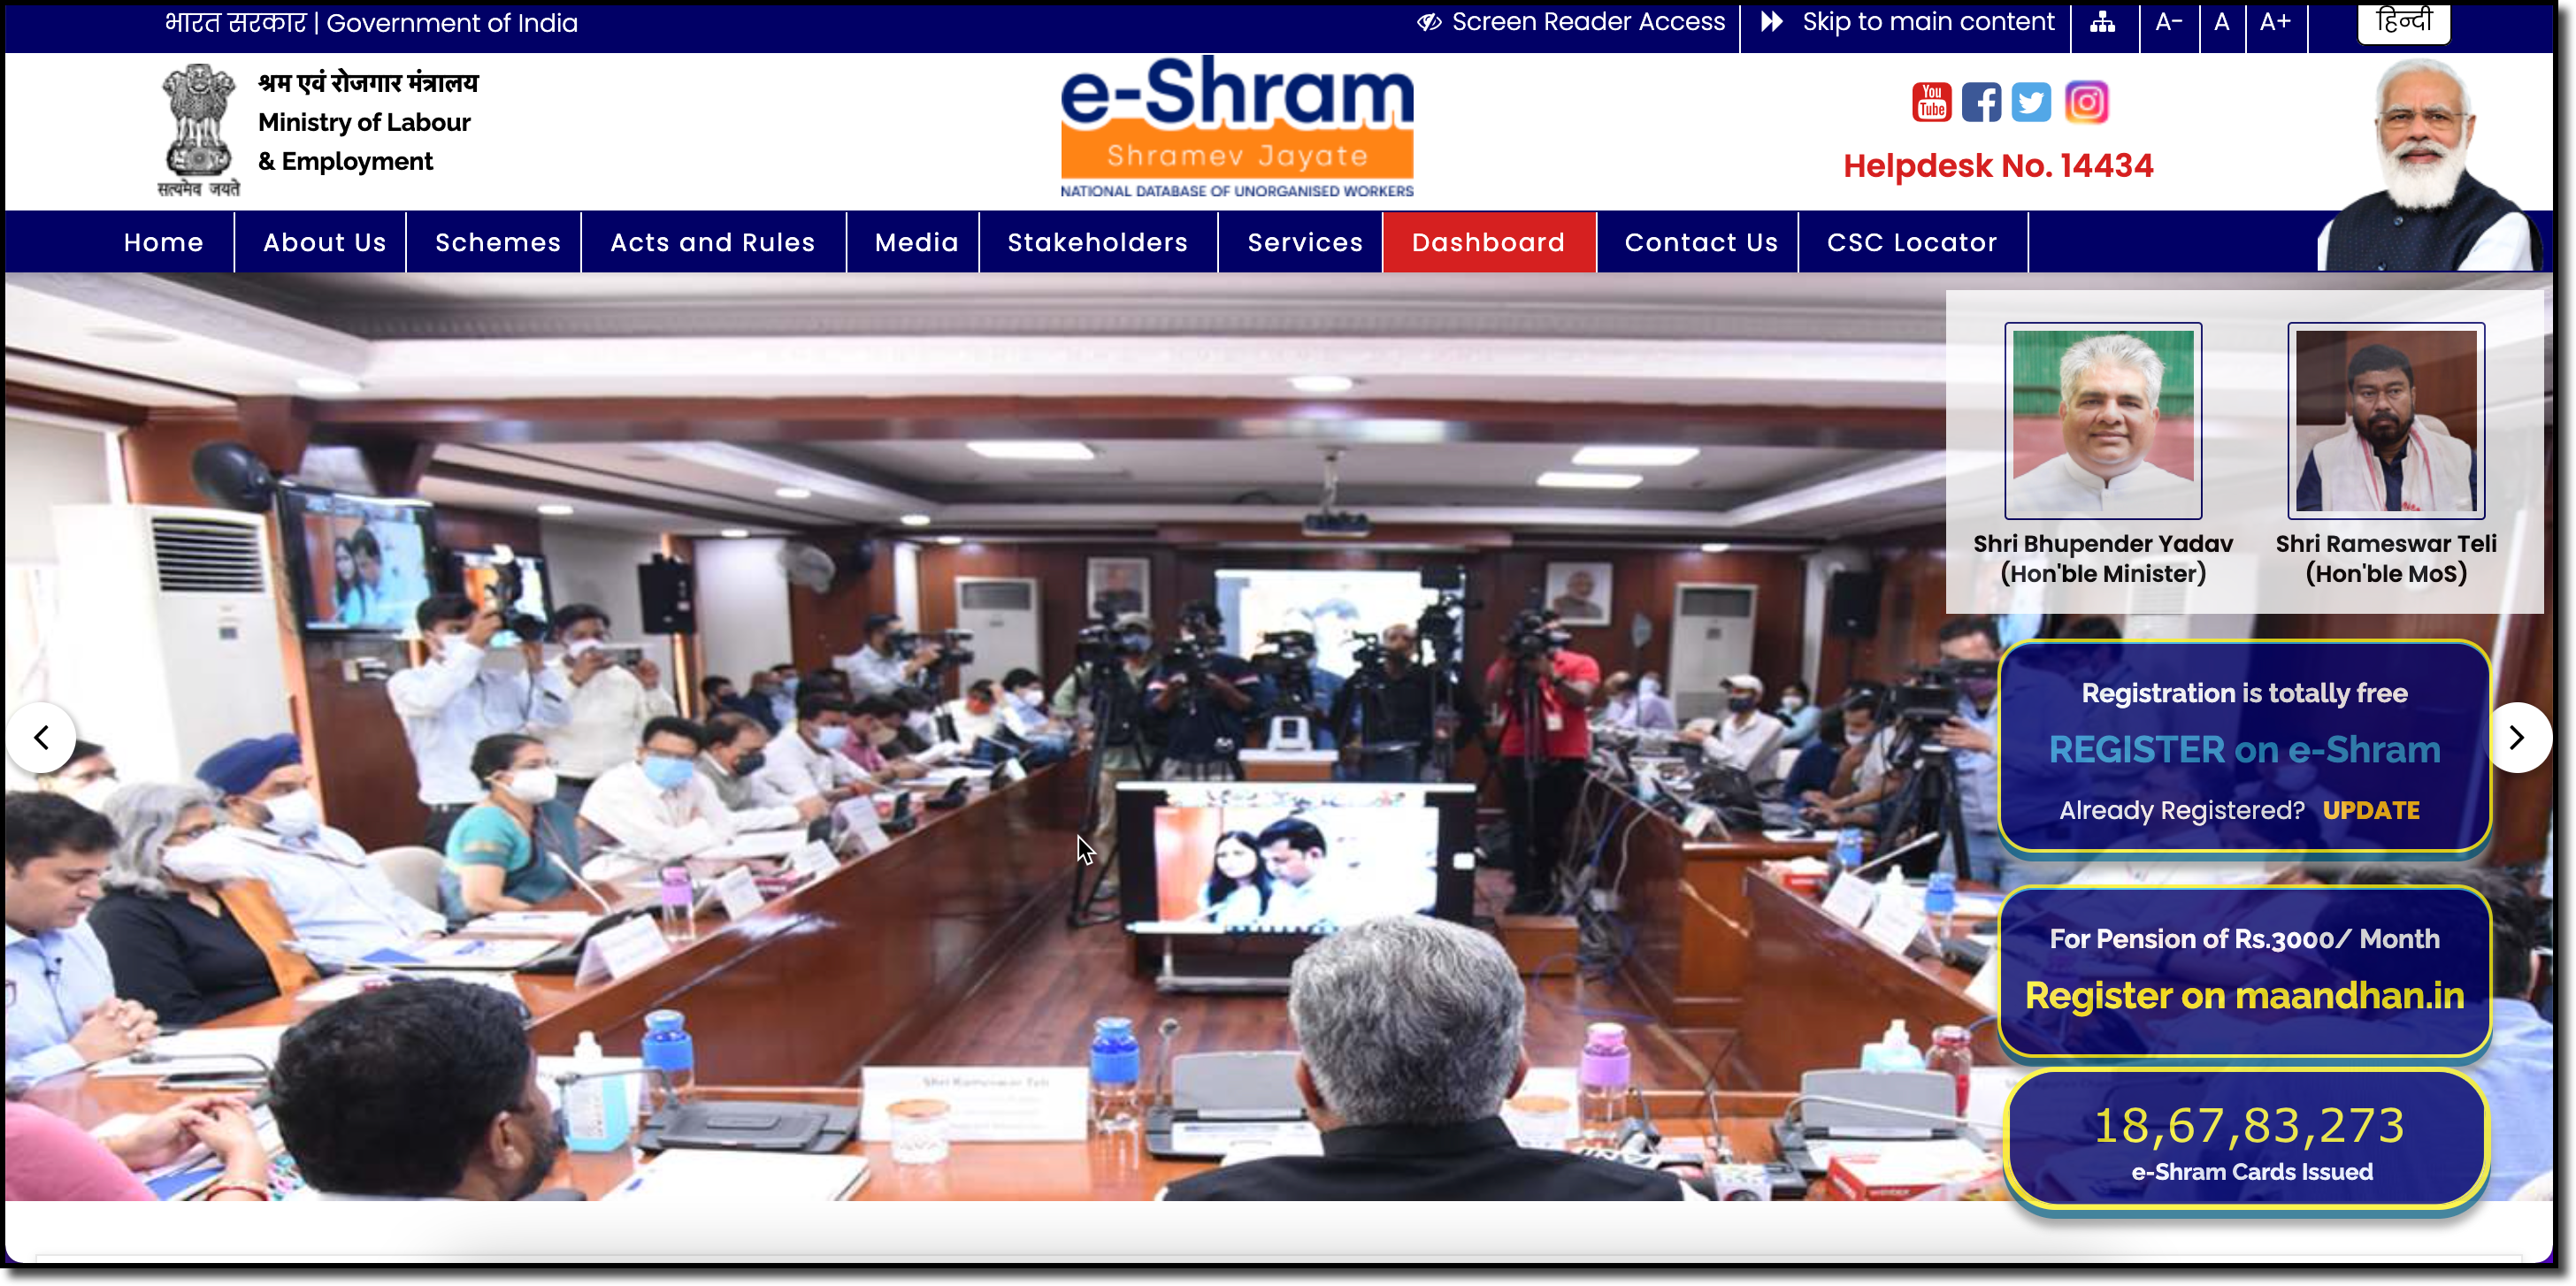
#Step 2. Now click on “Register on E-Shram“.
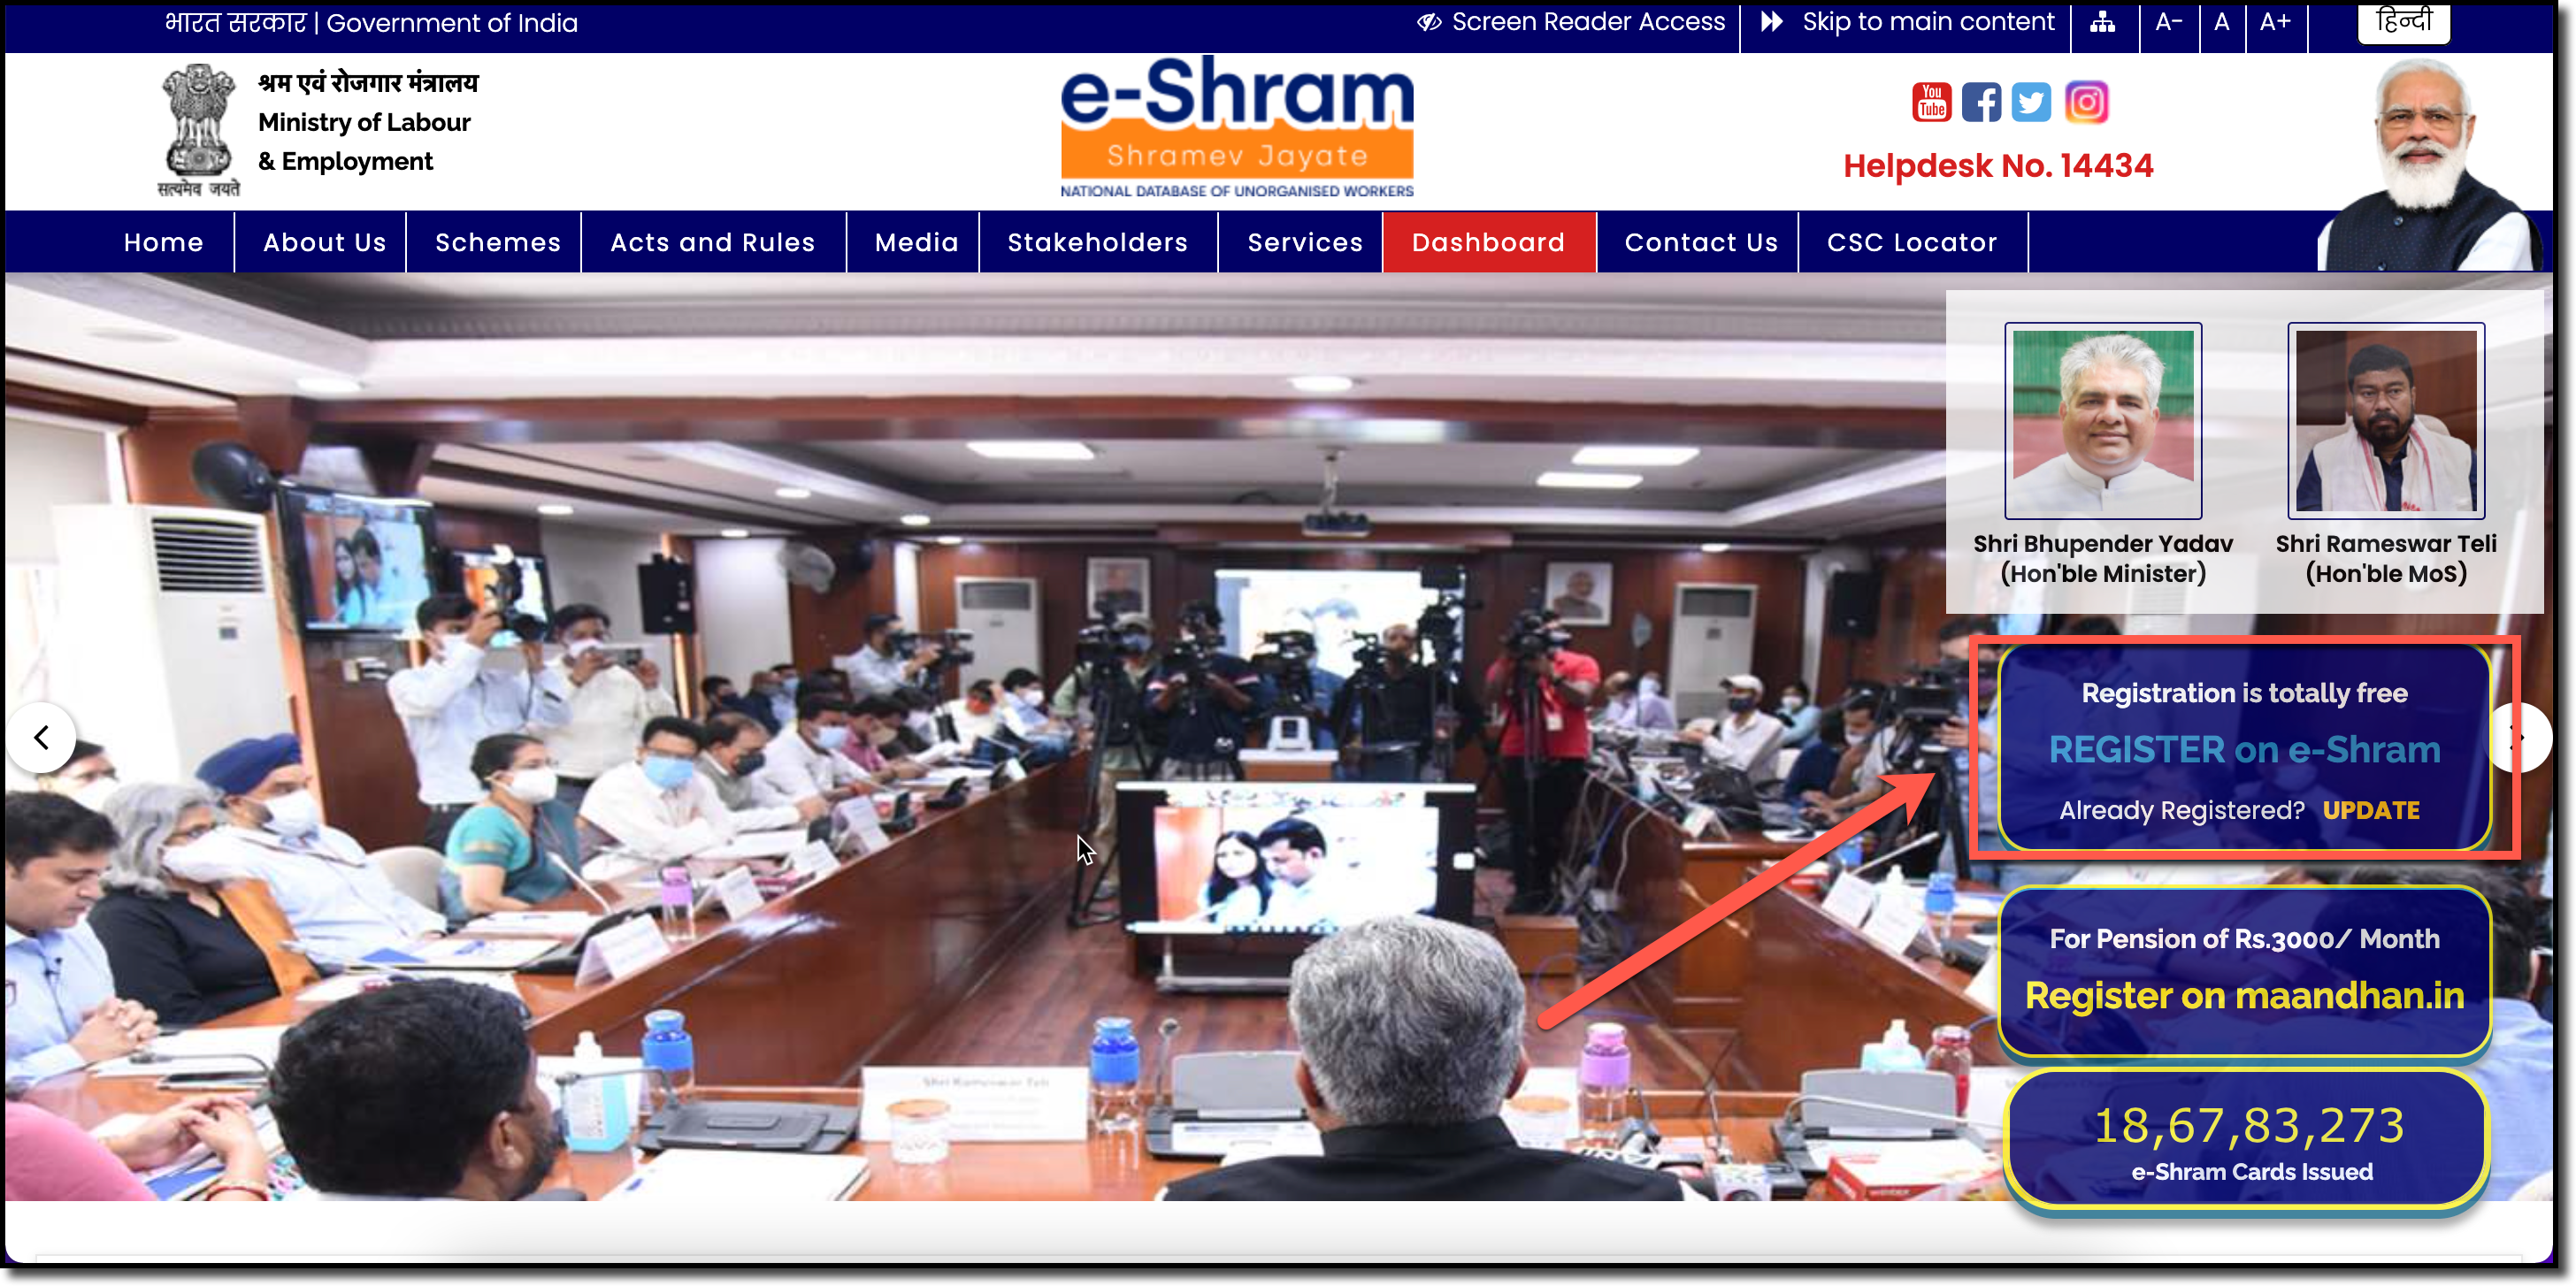
#Step 3. Now you will be redirected to a new page. Enter your Aadhaar Number and the Captcha Code that appears on your screen here and then click on “Send OTP“.
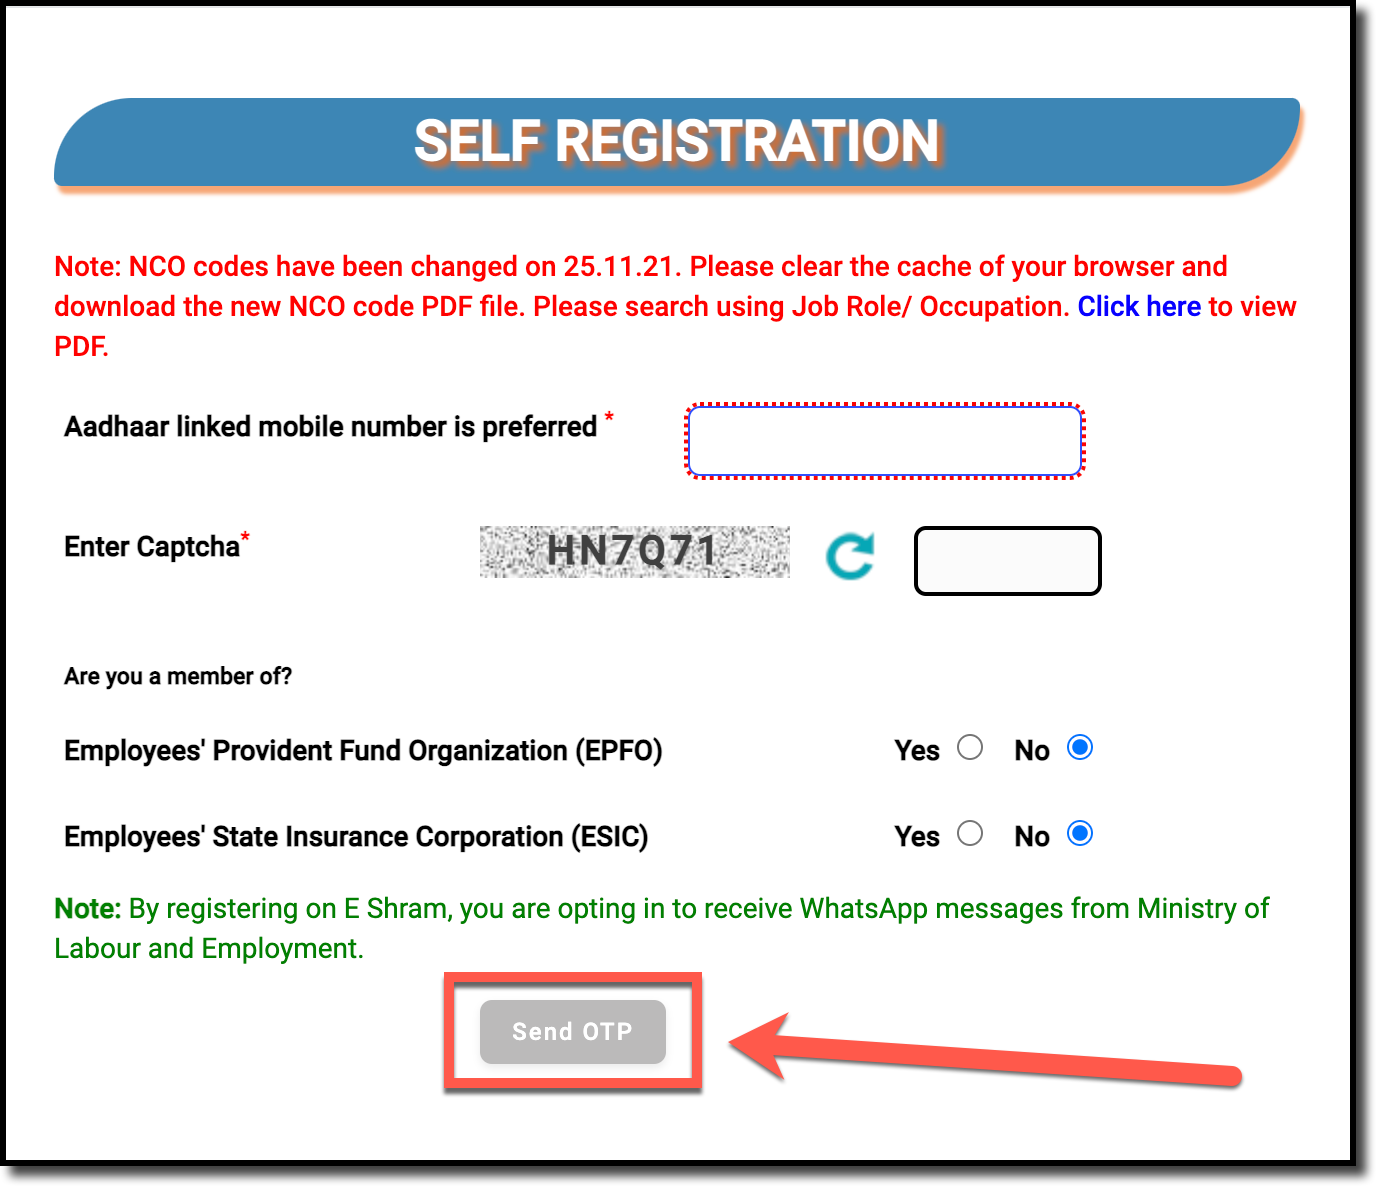
#Step 4. Now you will receive a One Time Password (OTP) in your Adhaar registered mobile number. Enter that OTP and click on “Submit“.
#Step 5. Enter your Adhaar Number, Tick mark to agree on the terms & conditions, then click on “Submit“.
#Step 6. Again you will receive an OTP on your Adhaar linked mobile number, enter that OTP, and click on “Validate“.
#Step 7. Now you can see your personal details on the screen, check all the details, then tick mark before “I agree” statement and click on “Continue to enter other details“.
#Step 8. You can now see that a form is open on your screen, Here your Registered Mobile Number is filled in, Now enter the other details like-
- Emergency Mobile Number
- Marital Status
- Father Name
- Social Category
- Blood Group
- Differently Abled- Yes / No
Note: After selecting your social category like SC / ST / OBC / General, upload your relevant social category certificate.
Now fill up the Nominee Details–
- Name
- Nominee Date of birth
- Gender
- Relationship with you
After properly entering the details, check and click on “Save and Continue“.
#Step 9. Now you have to enter your Residentials Details. Select Home State. Under the Current Address, section enter some details like-
- House Number
- Locality
- State
- District
- Sub District/Tehsil
- Pin Code
under Staying at Current Address, select the number of years you have been staying at your current address. In Migrant Worker, select Yes / No.
Tick mark before “Is permanent address same as the current address?” Now click on “Save and Continue“.
#Step 10. Now you have to enter details of your Education Qualifications like-
- Education Qualification– Select your highest qualification.
- Education Certificate– Upload your certificate of passing your highest qualification.
- Monthly Income Slab– Select your monthly income slab from the dropdown menu.
- Income Certificate– Upload your proof of income.
After filling up the details, click on “Save and Continue“.
#Step 11. In this Step, you have to fill in your Occupation and Skills Details like-
- Primary Occupation
- Working Experience in Primary Occupation (in years)
- Secondary Occupation
- Occupation Certificate
- How did you acquire skills?
- Skills to be upgraded
Now, click on “Save and Continue“.
#Step 12. In this step, you have to fill in your Bank Account Details like-
- Bank seeding with Adhaar
- Bank linked with Adhaar
- Register with Bank Account
- Bank Account Number
- Confirm Bank Account Number
- Account Holder Name
- Look up for the IFSC Code
- Bank Name
- Branch Name
Now, click on “Save and Continue“.
#Step 13. After clicking on “Save and Continue“, you will see Preview/Self Declaration page. Here you have to check all details filled by you and then tick mark the declaration statement and click on “Submit“.
#Step 14. Now you can see a Thank You message on the screen and E-Sharam Card digital copy ready to download.
Click on “Download UAN Card“. Save your E-Shram Card or print it for future reference. Now complete your registration by clicking on “Complete Registration“.
E Shram Card Helpline Number
The Indian govt. has introduced a helpline number for E-Shram Cards for domestic workers of unorganized sector.
E-Shram registered workers and non-registered workers, both can call on this toll-free number for their queries to resolve.
Tollfree Number for guidance and complaints- 14434.
Frequently Asked Questions
How to do E-Shram Card Self Registration online?
Follow the below-mentioned steps to complete the E-Shram self-registration process:
#Step 1. Visit E-Shram Offical Website i.e. eshram.gov.in.
#Step 2. Now click on “Register on E-Shram“.
#Step 3. Now you will be redirected to a new page. Enter your Aadhaar Number and the Captcha Code that appears on your screen here and then click on “Send OTP”.
#Step 4. Now you will receive a One Time Password (OTP) in your Adhaar registered mobile number. Enter that OTP and click on “Submit“.
#Step 5. Enter your Adhaar Number, Tick mark to agree on the terms & conditions, then click on “Submit“.
#Step 6. Again you will receive an OTP on your Adhaar linked mobile number, enter that OTP, and click on “Validate“.
#Step 7. Now you can see your personal details on the screen, check all the details, then tick mark before “I agree” statement and click on “Continue to enter other details“.
#Step 8. Youcan now see that a form is open on your screen, Here your Registered Mobile Number is filled in, Now enter the other details like-
Emergency Mobile Number
Email
Marital Status
Father Name
Social Category
Blood Group
Differently Abled- Yes / No
Note: After selecting your social category like SC / ST / OBC / General, upload your relevant social category certificate.
Now fill up the Nominee Details–
Name
Nominee Date of birth
Gender
Relationship with you
After properly entering the details, check and click on “Save and Continue“.
#Step 9. Now you have to enter your Residentials Details. Select Home State. Under the Current Address, section enter some details like-
House Number
Locality
State
District
Sub District/Tehsil
Pin Code
under Staying at Current Address, select the number of years you have been staying at your current address. In Migrant Worker, select Yes / No.
Tick mark before “Is permanent address same as the current address?” Now click on “Save and Continue“.
#Step 10. Now you have to enter details of your Education Qualifications like-
Education Qualification– Select your highest qualification.
Education Certificate– Upload your certificate of passing your highest qualification.
Monthly Income Slab– Select your monthly income slab from the dropdown menu.
Income Certificate– Upload your proof of income.
After filling up the details, click on “Save and Continue“.
#Step 11. In this Step, you have to fill in your Occupation and Skills Details like-
Primary Occupation
Working Experience in Primary Occupation (in years)
Secondary Occupation
Occupation Certificate
How did you acquire skills?
Skills to be upgraded
Now, click on “Save and Continue“.
#Step 12. In this step, you have to fill in your Bank Account Details like-
Bank seeding with Adhaar
Bank linked with Adhaar
Register with Bank Account
Bank Account Number
Confirm Bank Account Number
Account Holder Name
Look up for the IFSC Code
Bank Name
Branch Name
Now, click on “Save and Continue“.
#Step 13. After click on “Save and Continue“, you will see Preview/Self Declaration page. Here you have to check all details filled by you and then tick mark the declaration statement and click on “Submit“.
#Step 14. Now you can see a Thank You message on the screen and E-Sharam Card digital copy ready to download.
Click on “Download UAN Card“. Save your E-Shram Card or print it for future reference. Now complete your registration by clicking on “Complete Registration“.
Which is the Official Portal for E-Shram Card Registration?
https://eshram.gov.in/ is the Official Portal for E-Shram Card Registration.
Conclusion
This is it for “E-Shram Card Registration“. I hope we have cleared all your queries related to this topic.
If you have any further queries, kindly comment below. We will try to help you out as soon as possible.
Read More from the Registration Category.

